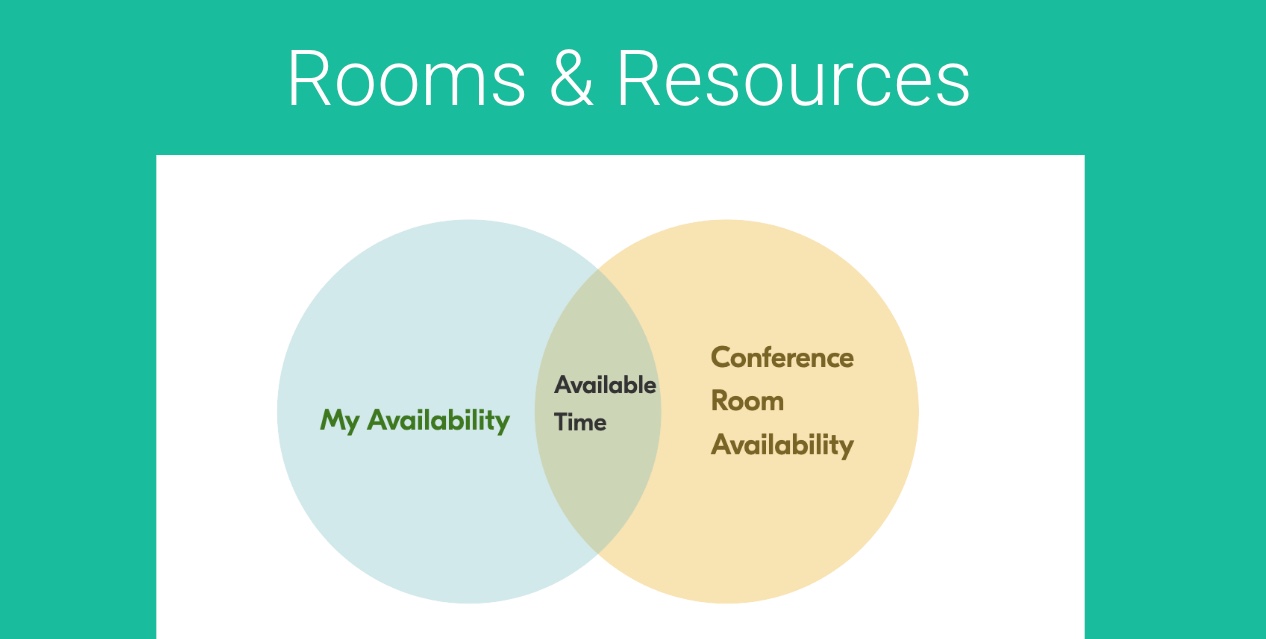
When scheduling a meeting, you often need a specific space, like a conference room, a dedicated office, or another area to host your gathering. These spaces are typically shared, meaning others may use them too, so reserving them in advance is essential.
That’s where the Rooms & Resources feature comes in—a simple solution to secure the space you need, when you need it.
First you need to setup a Room/Resource Record. Do this by going to Management > Rooms & Resources. Note, this section is available to all Business Plan Users AND requires Admin permissions OR you need to grant anyone who you want to be able to manage Rooms & Resources access to this via Profiles.
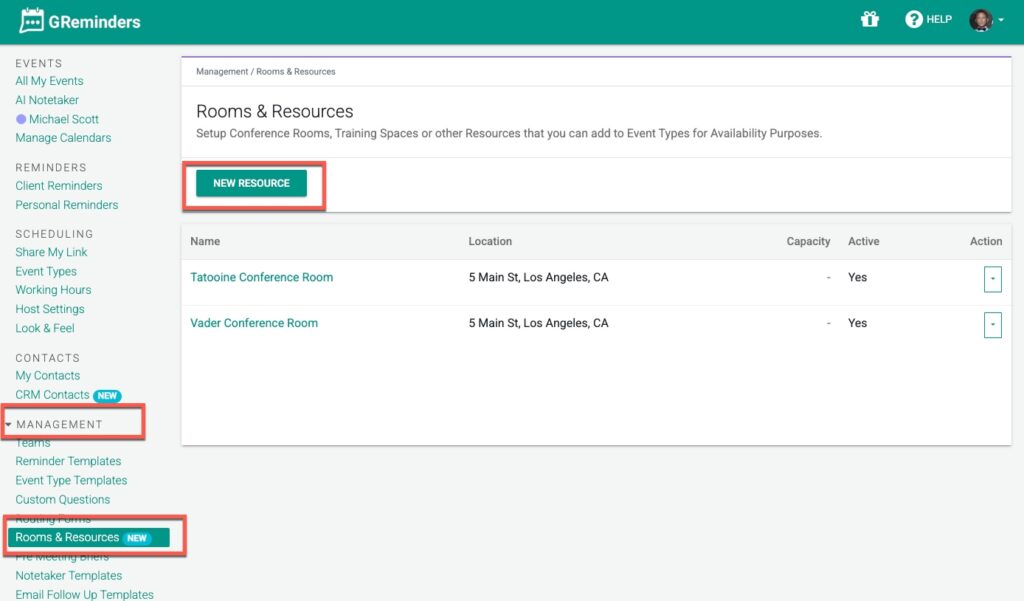
Click New Resource
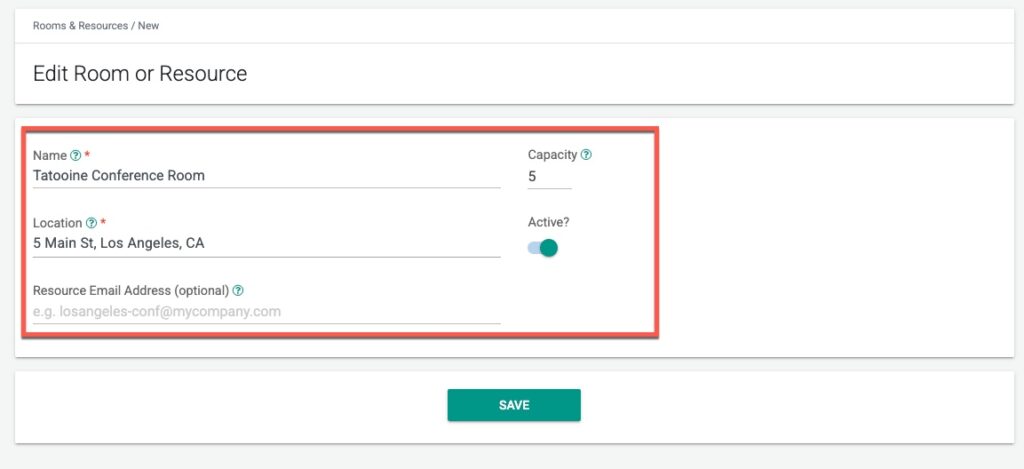
Here you need to:
- Give the Resource a Name (This is an Internal name of the Conference Room or Resource)
- Give it a Location
- Locations should be your Physical Office Location or something your Customers will understand
- This is the what will show up in the Location field of the Event itself
- Give it a Capacity (how many people can fit in the room), while this is optional its useful information.
- IF you are using Rooms & Resources with Office 365 OR Google Rooms/Resources you should put the Resource EMAIL ADDRESS here. You can find this by going to the Microsoft Office 365 Admin panel and navigating to Rooms/Resources, find the room, which will show you the Email address. Same goes for Google GSuite Workspaces. If you are not using this Google/O365 feature you can leave this blank.
- Note: You could create a “virtual resource” by creating an email address that is used by your staff when not using GReminders booking pages. It could be [email protected] for example, and if you use this on your invites for events not booked via GR, GR will see this and block this time on GR side.
Note, Resource Availability is managed by GReminders internally, meaning times will be unavailable if someone else is using this resource.
Setup as many conference rooms as you have. If they are in the same location please reuse the same location field.
Next go to one of your Event Types and “use” the conference room. Under the location field select the Location you created in your Conference Room
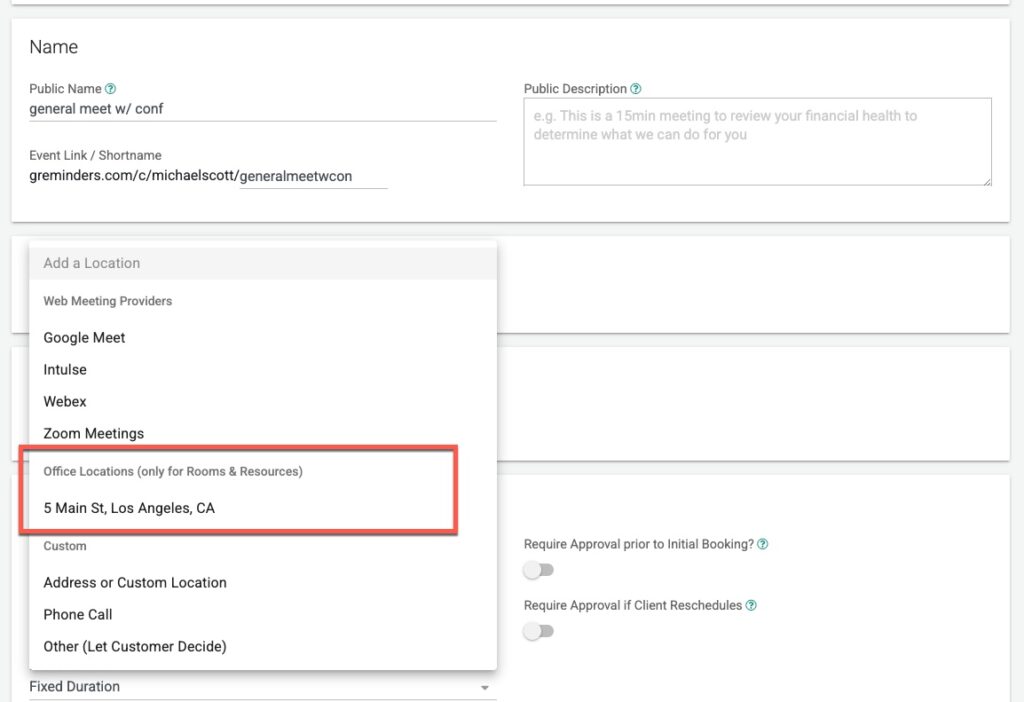
Then select the Conference Room(s) you want to require to be available for your Meeting
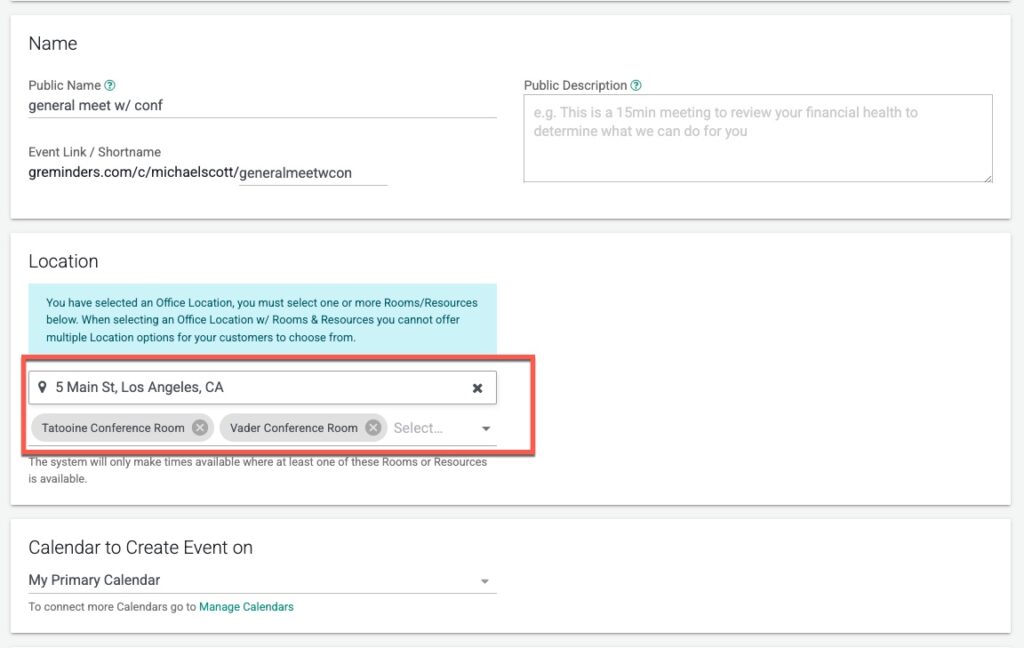
What this means is that at least ONE of these 2 conference rooms above MUST be available for the time slot to be bookable. This acts like its own “Round Robin” for the Conference Rooms for this Event.
Save the Event Type and run a test.
Book a Meeting and see it appear on your Calendar.
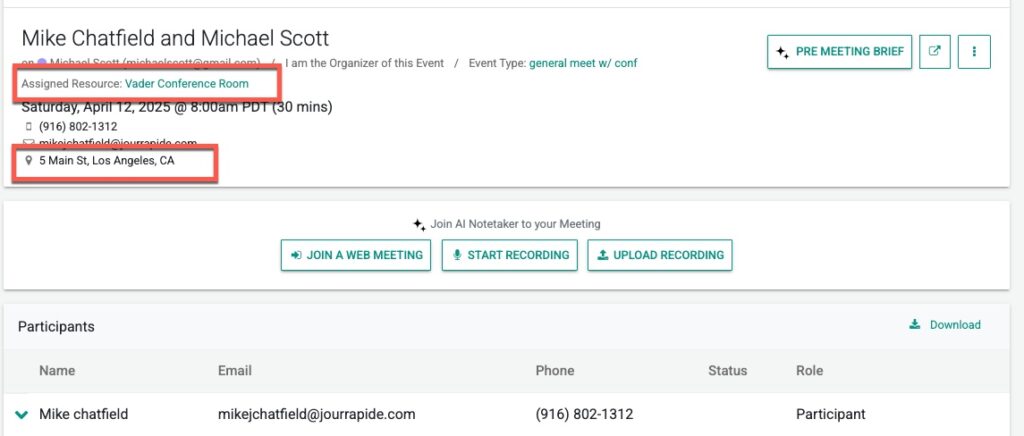
Notice when you navigate to the Event within GReminders you will see the Conference Room attached like the image above.
If you had an email address on the Room/Resource it would appear in the Event Participants.
Other Things to Note:
- Rooms & Resources is a Business Plan License Feature
- Resources respect the same Event Buffer as on your Event Types.
- Rooms & Resources are available on 1:1 or Team All Together Event Types
- Default Max 20 Resources per Org (request more by emailing to [email protected])
- You cannot mix/match Virtual and Physical Locations on Event Types when using Rooms & Resources. This means any event that uses Event Types will only be for that location with at least one Room/Resource attached.
That’s It.
If you need help please reach out to [email protected]
Happy Scheduling!