Companies and Organizations with multiple users on their GReminders account may wish to standardize the messaging their clients receive. Depending on your industry and company affiliation, client communications may require approval by your compliance department. GReminders has implemented ways to manage and deploy reminder templates for your department or entire organization.
Admins and Managers in organizations with multiple users can now create reminder templates at the Management Level. Individual users will then have access to the managed reminder templates, based on their designated Groups.
Managed Reminder Template Setup
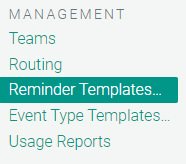
Select Reminder Templates under Management.
Default Settings for New Users
Prior to setting up individual templates, check to be sure the default settings for all of your reminders are correct:
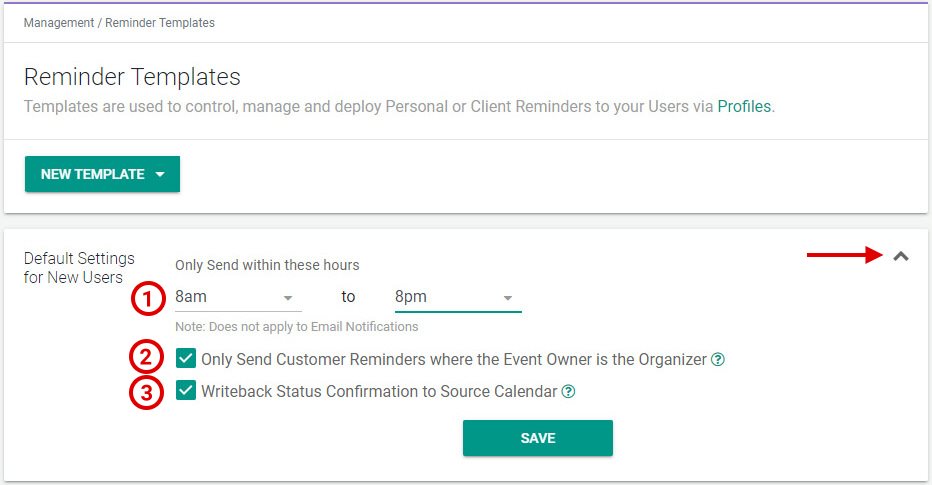
You have the following options:
1.) Select the time range you will allow SMS reminders to be sent. 8am – 8pm is the default value.
2.) Typically, you would want to only send reminders where the event owner is the organizer (the default setting). However, when a calendar you are connected to has no “Organizer” role (Redtail calendar), you will generally want to uncheck this option in order to allow admin staff to schedule for other users.
3.) The confirmation status of an event will be written back to the connected calendar when Writeback Status Confirmation to Source Calendar is checked (default setting).
Starting a New Client Reminder Template
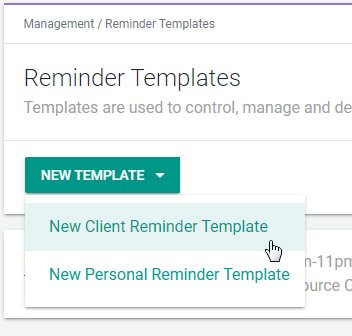
Once you have confirmed your default setup is correct, select “New Template” and choose what type of template to create (we’ll discuss a Client Reminder Template in this article).
Selecting a Purpose
The first option to choose is the purpose of this reminder template. You can choose from a standard reminder, follow-up reminder, or an initial, reschedule or cancellation notification.
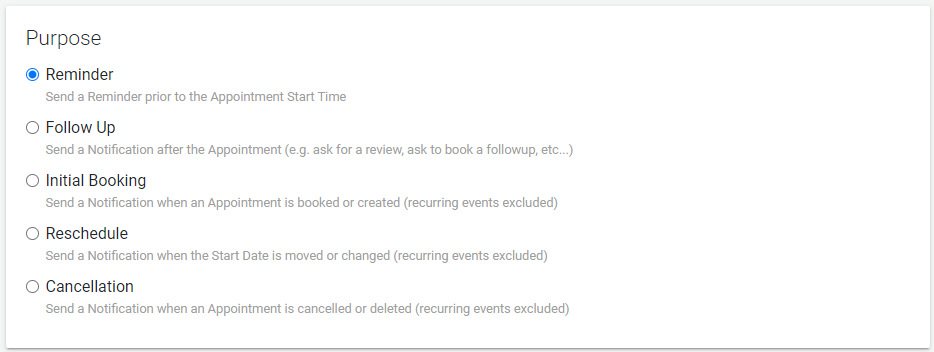
Once you select a purpose, this cannot be changed at the management or user level.
Custom Criteria
Next, include any Custom Criteria or condition that will trigger this reminder to be sent to the client.

This is the first section that will allow you to manually select “Locked” or “Unlocked” status. If you choose “Locked”, the user will be unable to edit the Custom Criteria.
Select How to Send the Reminder Message
You will have 3 options available on how to send this reminder, Email, SMS or Voice. SMS is the default method.

Just as when selecting the Purpose, the Send via choice cannot be edited by the manager or user once the template is created.
Select the Timing
Choose when you would like this reminder to be sent to the event invitee. You will have different choices available depending on the Purpose chosen.

You can lock this section or allow users to change the timing at the user level.
Content
Next, create the content for the reminder or notification message.
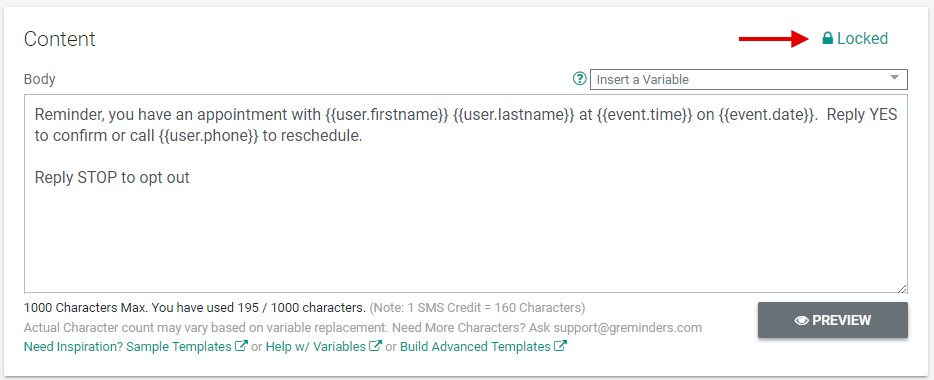
If you lock this section, be sure to include variables or standard text that all users who will have access to this template can use. For example, if you have multiple locations with different phone numbers (and you don’t wish to use the user.phone variable), you may wish to set up specific groups for each location and create managed reminder templates for each group.
Setting up Auto-Replies
GReminders can send your event attendees automated replies depending on their responses to reminders they receive. For example, when you ask your clients to confirm their appointments by replying with “Yes”, an auto-reply can be configured to thank them for confirming.
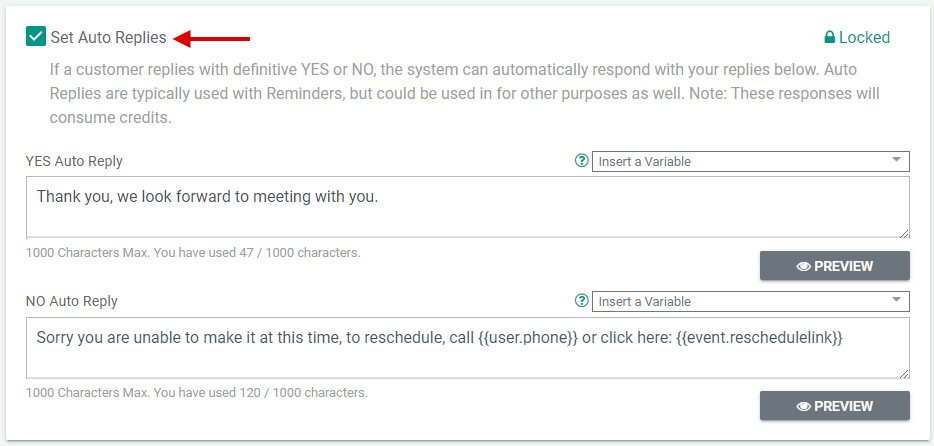
To send Auto Replies, select the checkbox as shown above. You can create messages for a Yes or No confirmation. This section can be “Locked” or “Unlocked”
Settings
Finally, under Settings, you can include a Nickname for this template, include internal notes to help you understand the purpose and who has access, and if you wish to deactivate the template for all users with access.
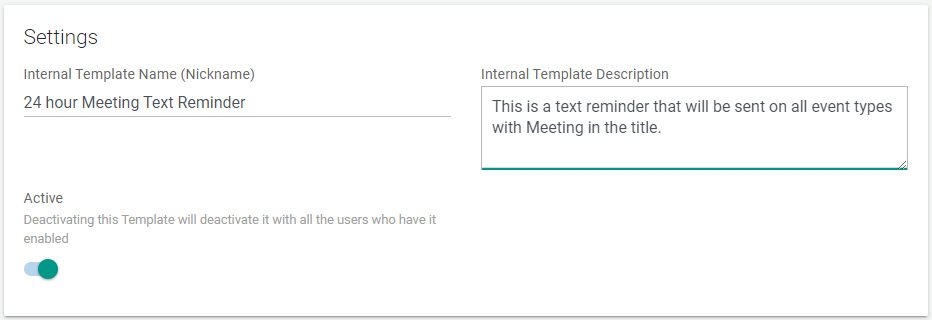
Assigning Your Template to Groups
After Creating your template, you will be able to select which users will have access to the template. This is done by selecting the Group(s):
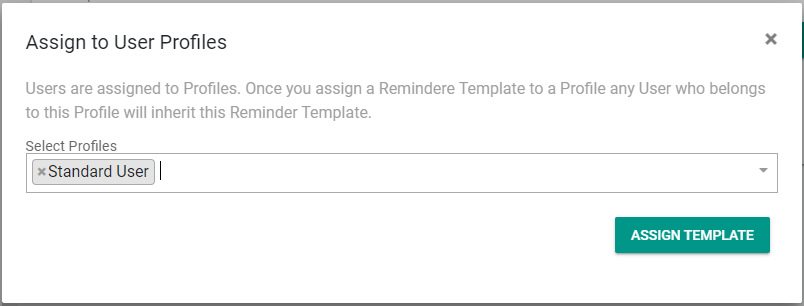
In the example above, only those users under the “Standard User” group will have access to this template. When you invite a new user assigned as a “Standard User”, this reminder template will be available immediately upon signup.
Editing Group Assignments
If you would like to edit the groups who will have access to this template in the future, click on the Reminder template and select Assignments.
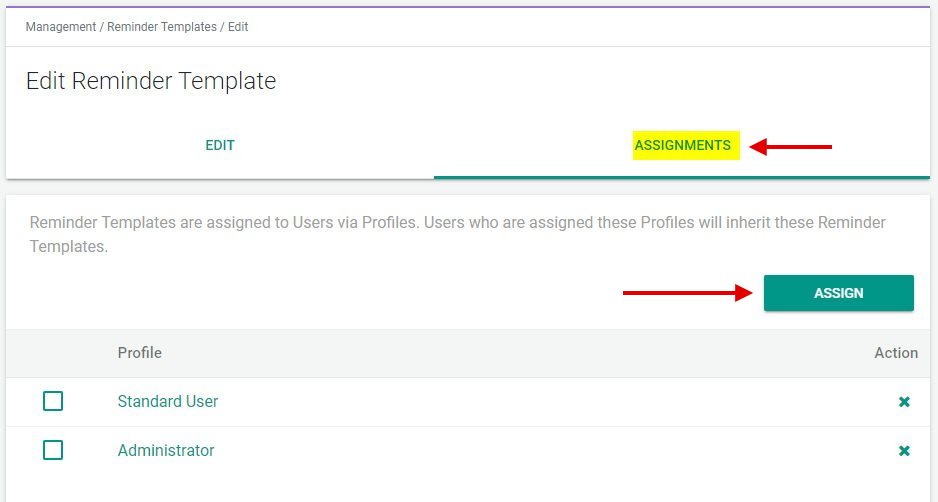
Then select the group from the list you wish to remove access (an unassign button will appear) or click on the Assign button to add another group that you would like to give access to the template.
Reminder Templates at the User Level
Once Reminder Templates have been setup at the Management level, users will have access to the templates at the User level:
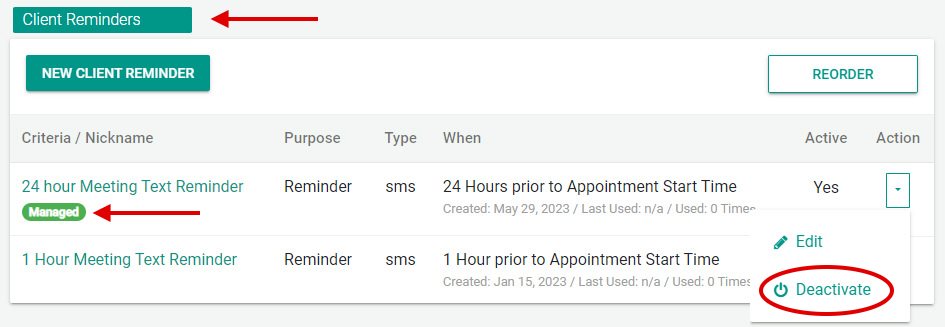
Users will access Reminder Templates from the main menu. Notice the “Managed” badge in the image above. This lets your users know that the template was set up and is being managed by the administrator. If the user does not wish to use the template, it can be Deactivated by selecting the Action dropdown menu and selecting “Deactivate”.
Controlling Users Ability to Create Their Own Reminder Templates
If you would like to limit users in a specific profile from having the ability to create their own templates, you can use the profile settings to accomplish this:
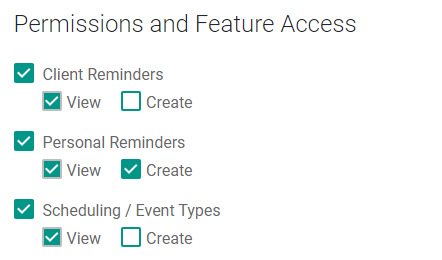
In the example above, users under the selected profile can view/access Reminder Templates created by an Admin, but cannot create their own templates. The same is true for Event Types, however, users are allowed to create their own Personal Reminders as it is checkmarked.
Conclusion
Using Managed Reminder Templates will allow businesses and organizations with several GReminders users to control messaging and allow better management by administrators on the account.
Managed reminder templates are available with our Business Plans. If you have any questions or would like to try Reminder templates, please don’t hesitate to contact us.
Happy Scheduling!
